Five Half-Square-Triangle Hills

Early in 2013 our little quilting group in my small town was inspired by Edyta Sitar’s book, “Friendship Triangles” to start a half-square-triangle exchange.

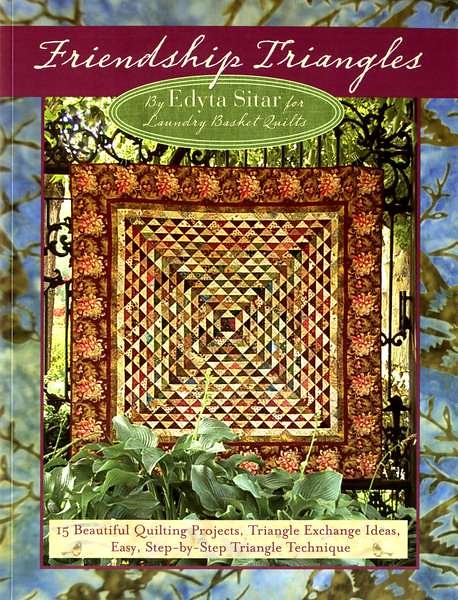
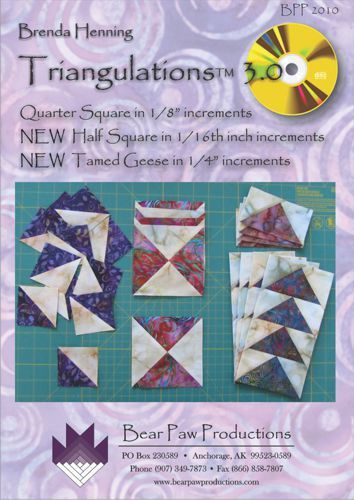
Eventually, 10 participants exchanged 12 half-square triangles (hsts) once a month for six months resulting in a collection of 720 hsts for each of us. We decided that paper piecing was the best way to insure consistently constructed hsts. We used the “Triangulations” software by Brenda Henning to print out the paper piecing foundations.


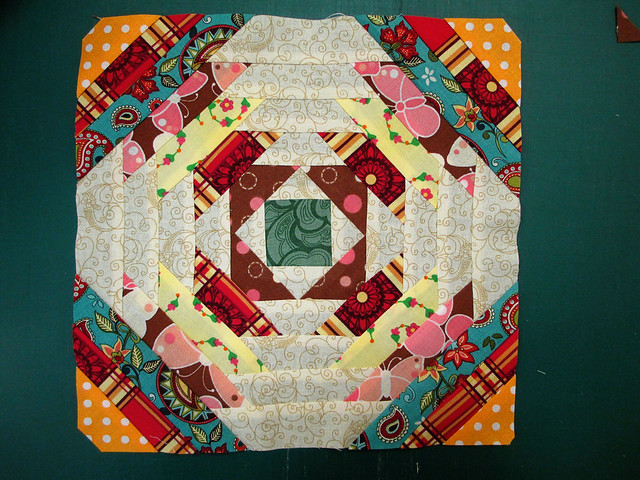
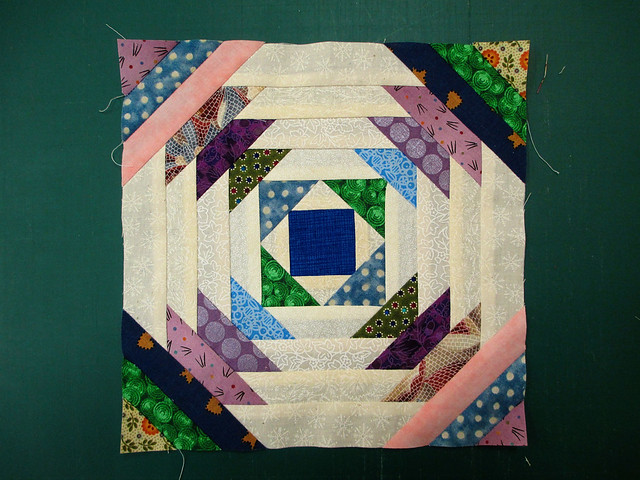
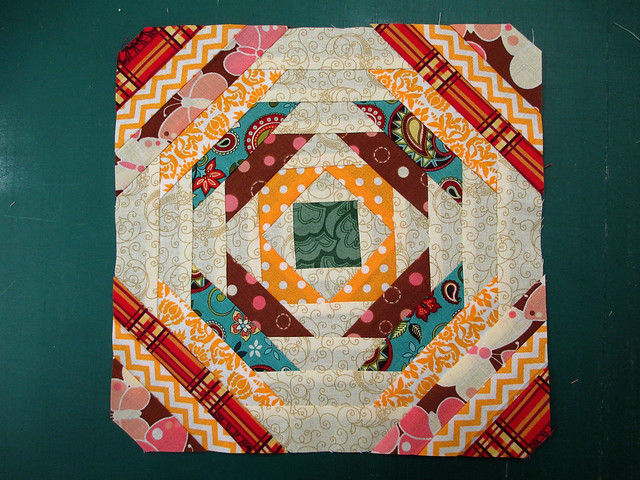
One person in the group used the cover pattern from Edyta’s book, one person used a pattern from a magazine, and another made up her own zig-zag design. I used EQ7 and toyed with several designs, eventually settling on this idea:

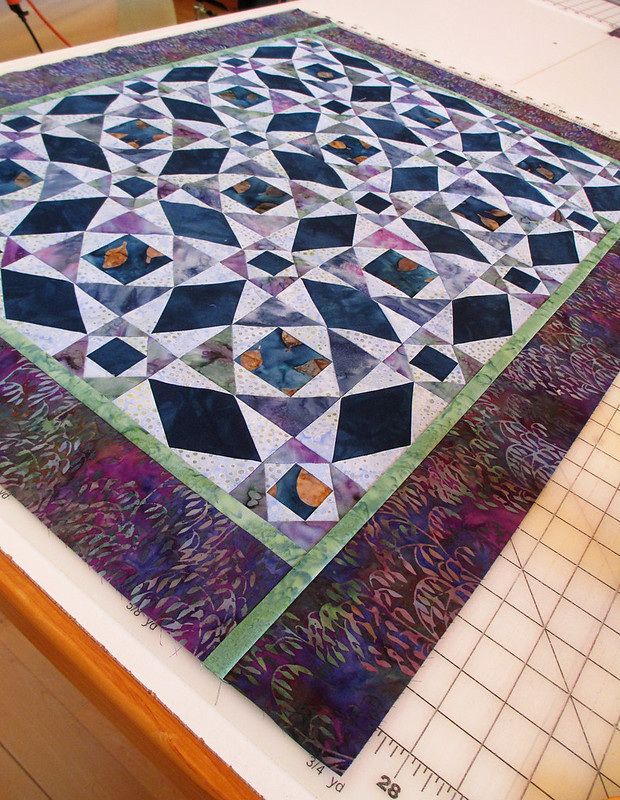
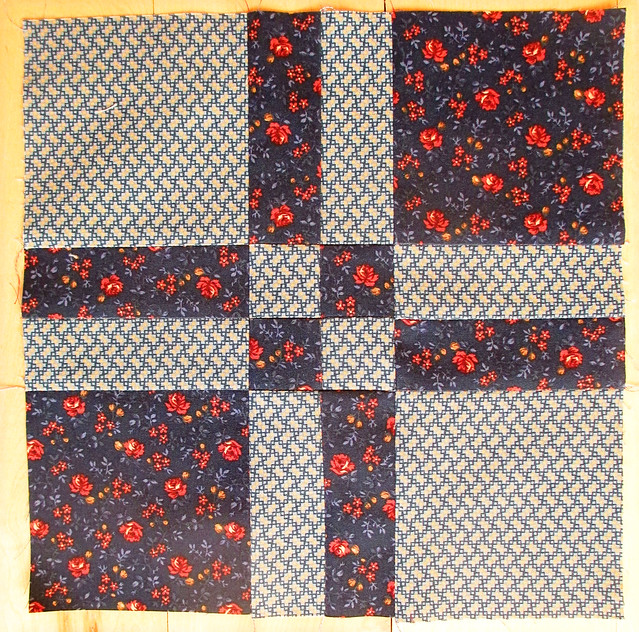
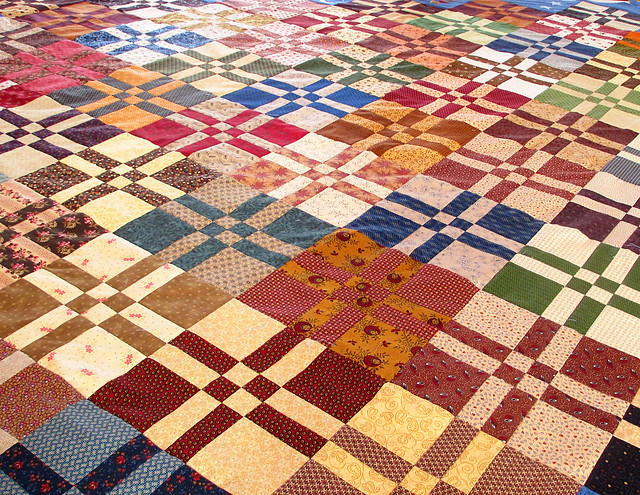
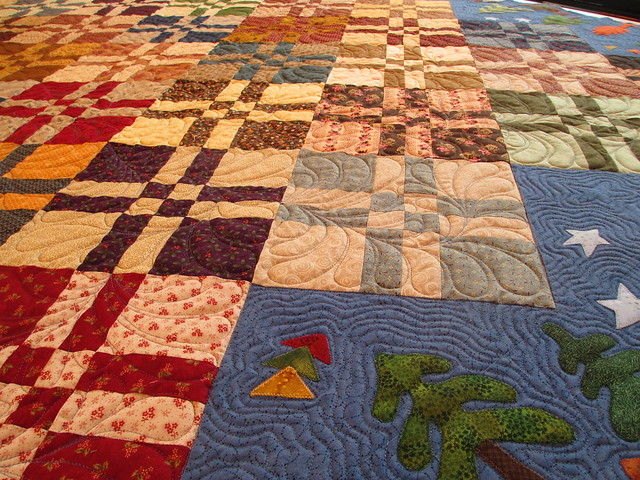
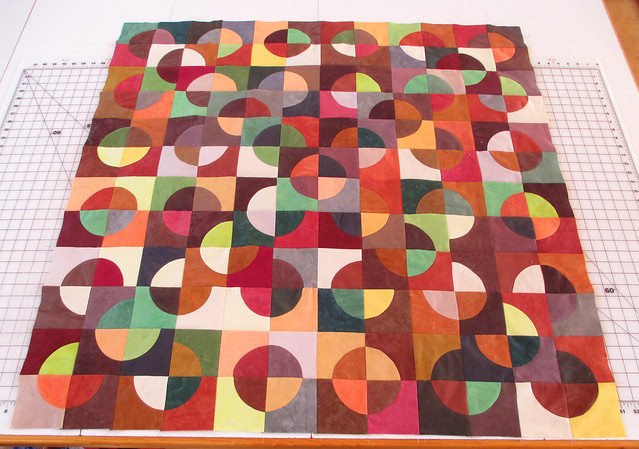
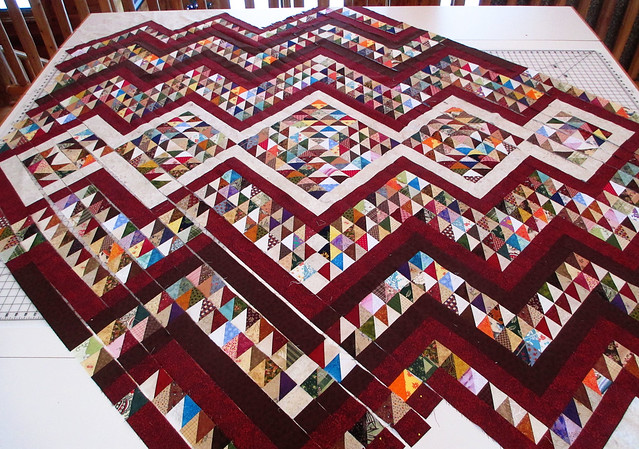
Of course, the real quilt employed many different colors and patterns of hsts. This is a picture during construction. The hsts and some filler red, white and browns were sewn into diagonal rows first.:

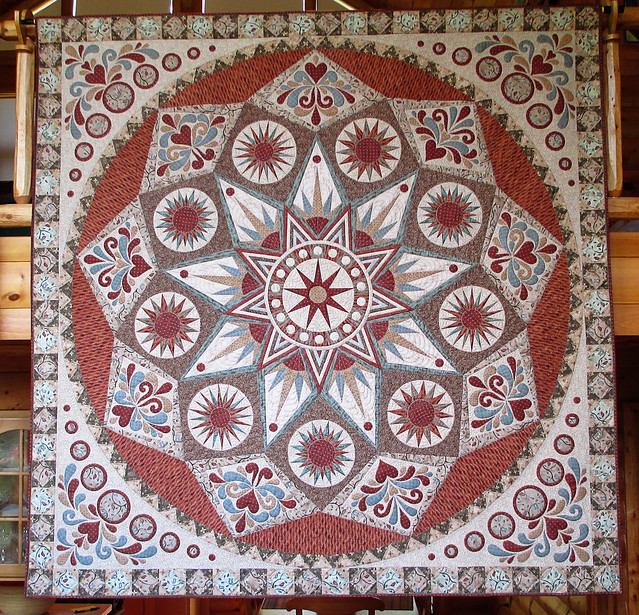
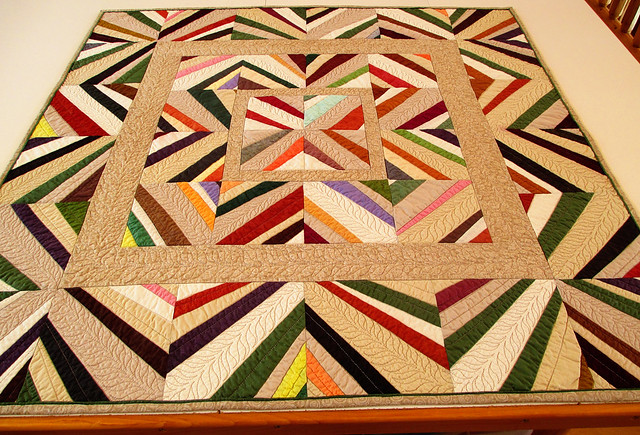
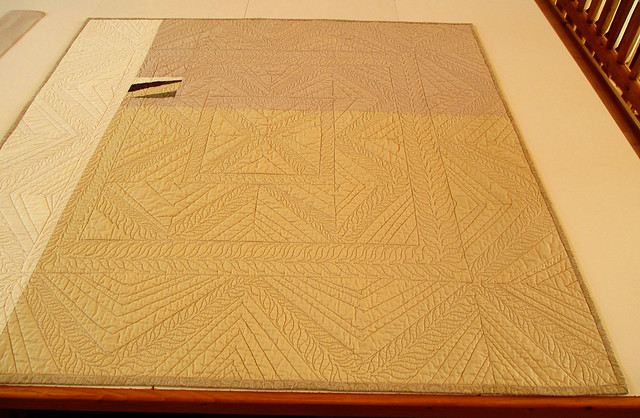
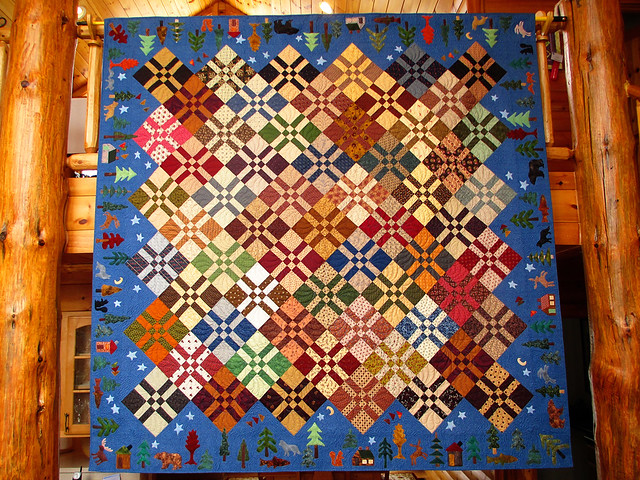
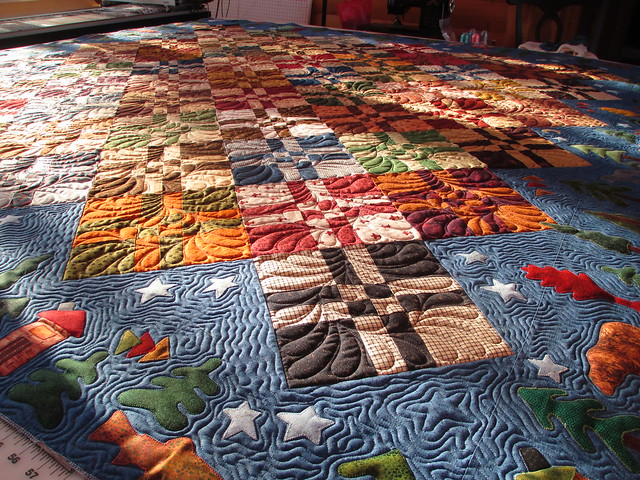
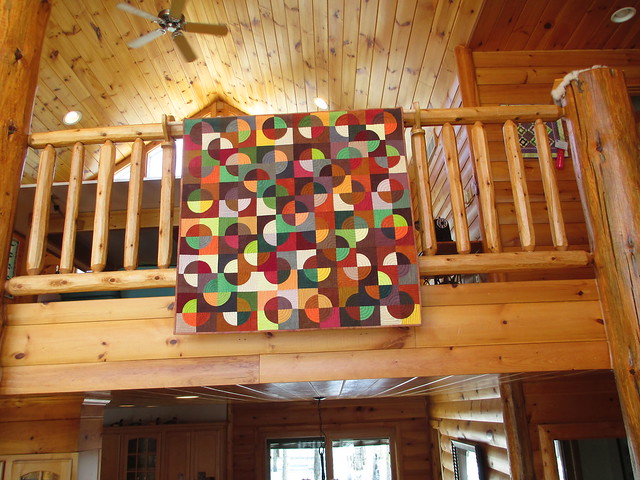
Here is the top, complete with a solid brown border:

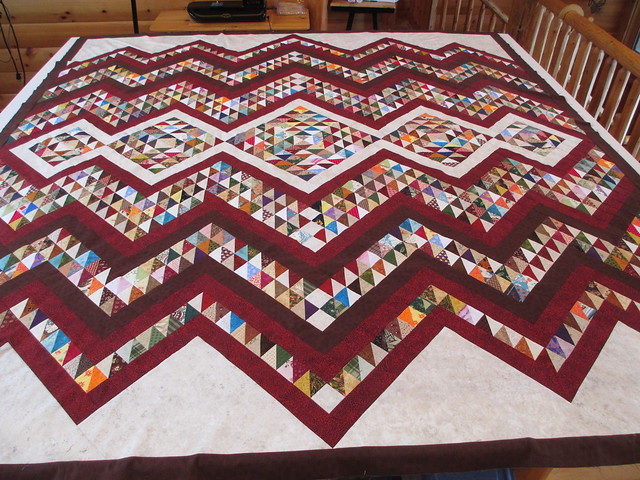
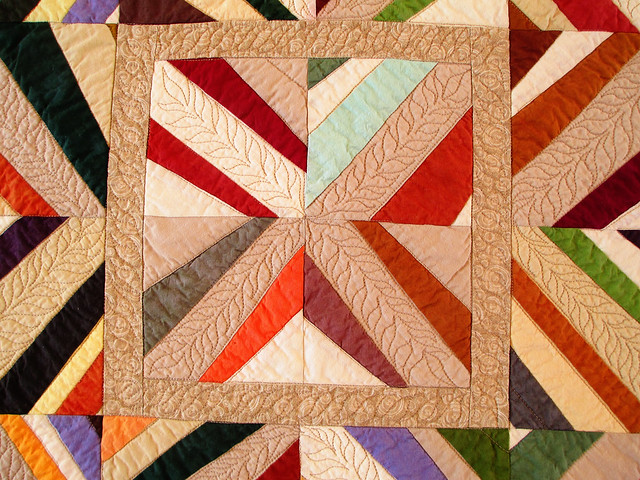
Some features of the design are hsts pointing toward the left on the right side of the top and hsts pointing toward the right on the left side, five “barn raising” arrangements of hsts across the center, solid red, white and brown zig-zags, and a narrow brown outside border.
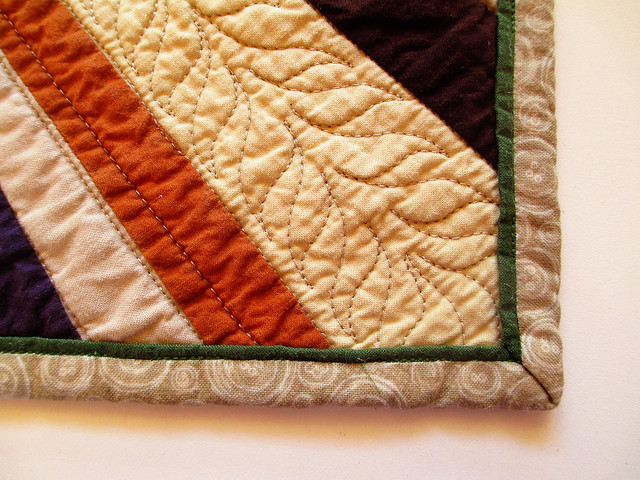
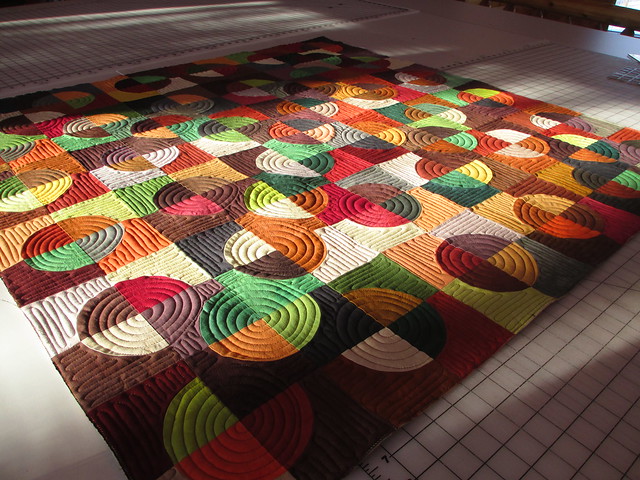
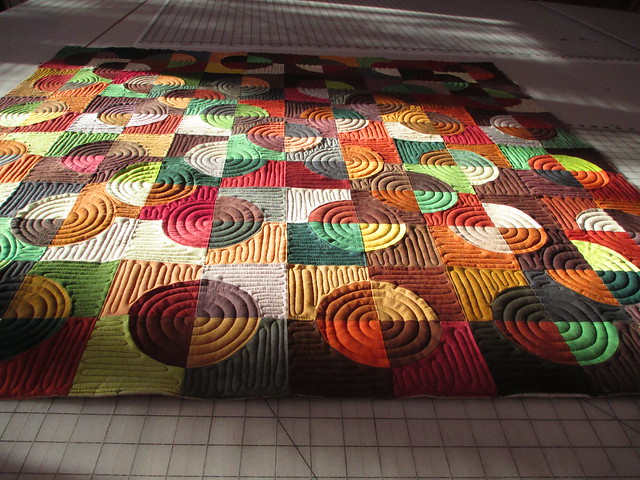
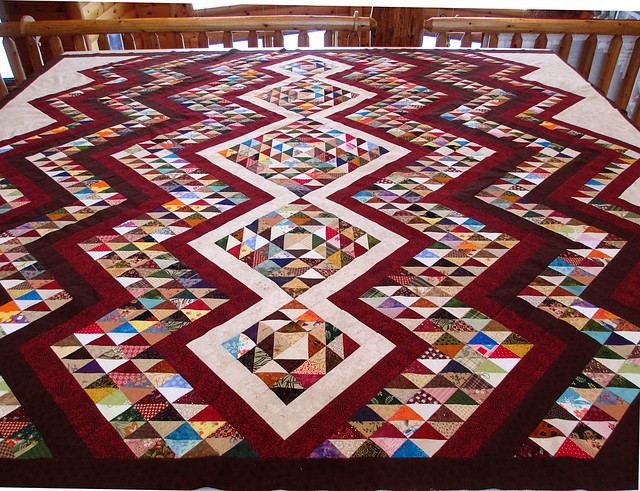
A view of the completed top from the side:

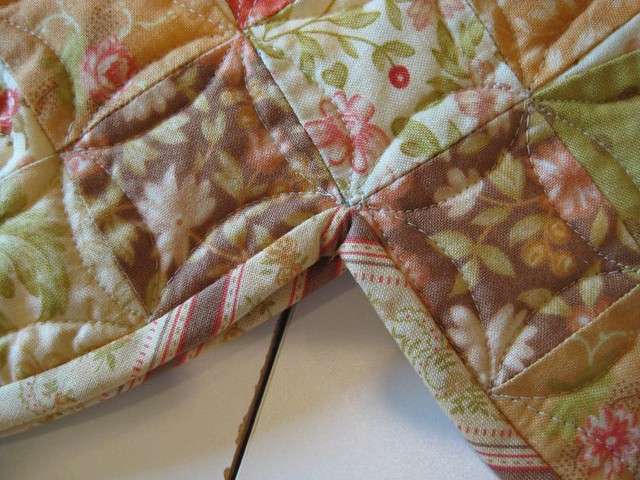
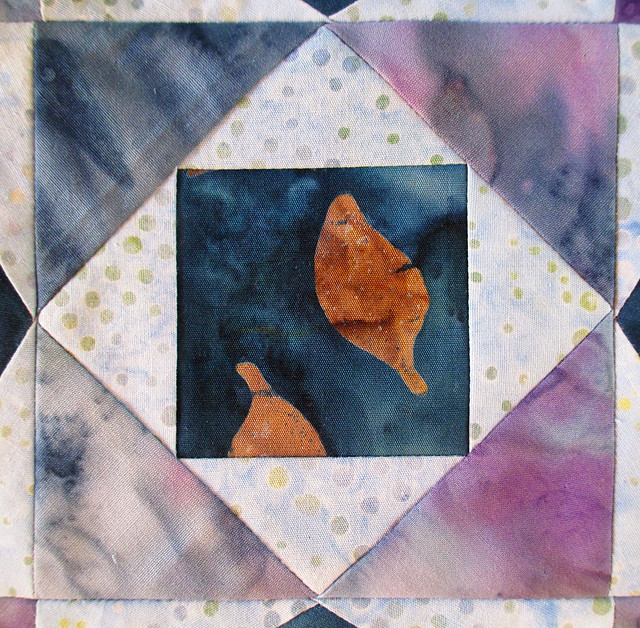
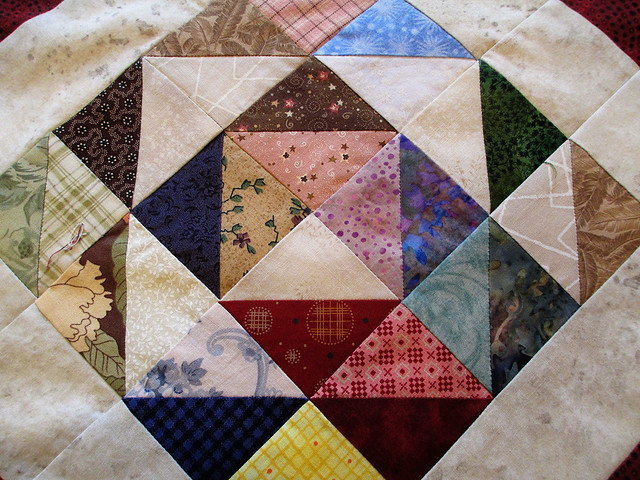
After the whole top was sewn, I noticed one hst I thought provided too little contrast in one of the smaller barn-raising squares. The dark side of the pink hst was lighter than some of the adjoining “lights.”

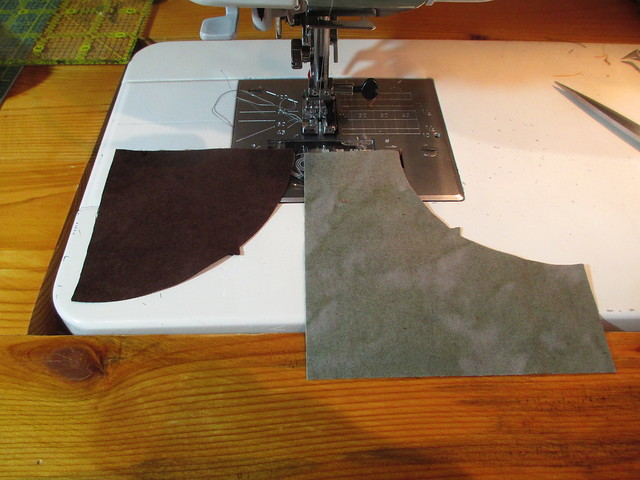
What to do? Excavate it!

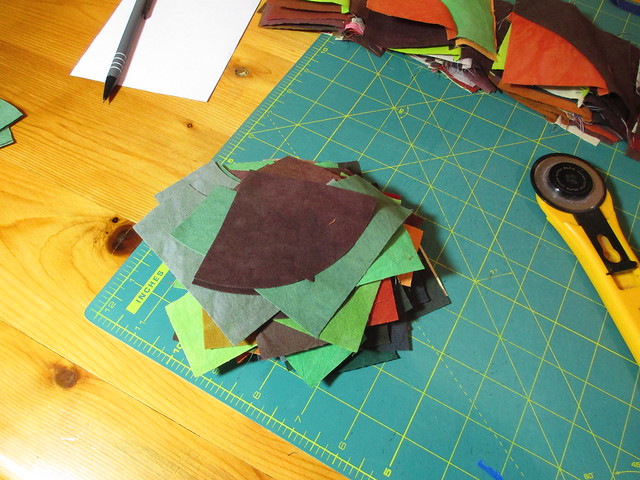
Choose a better hst:

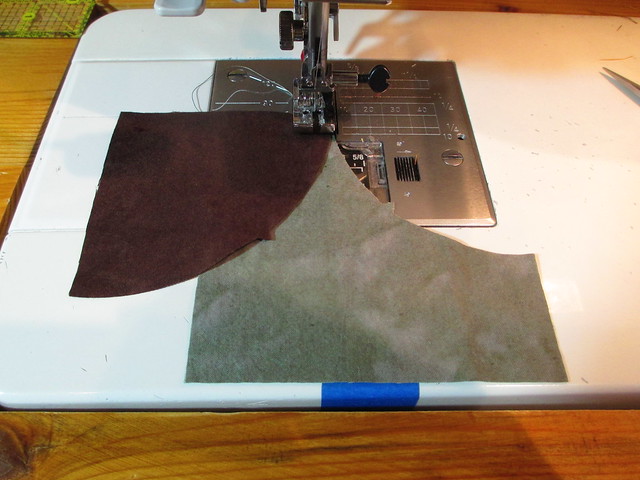
Sew in the new selection:

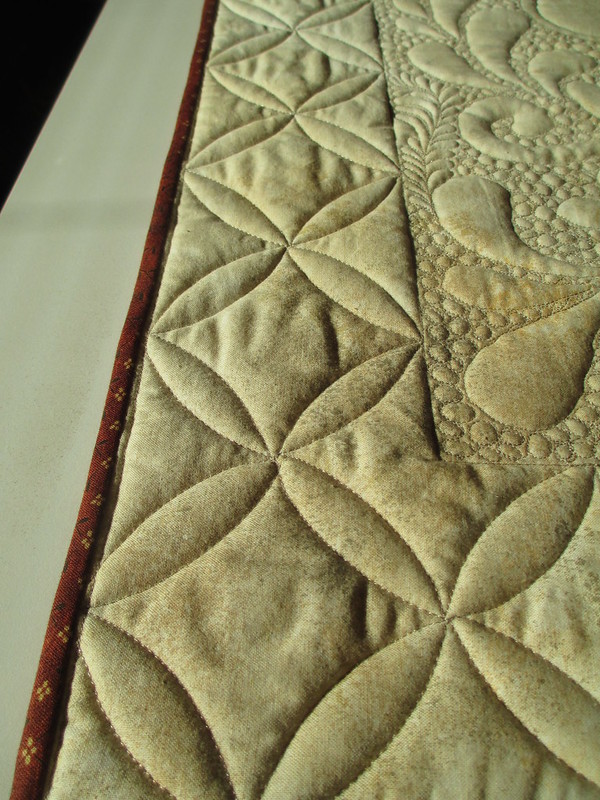
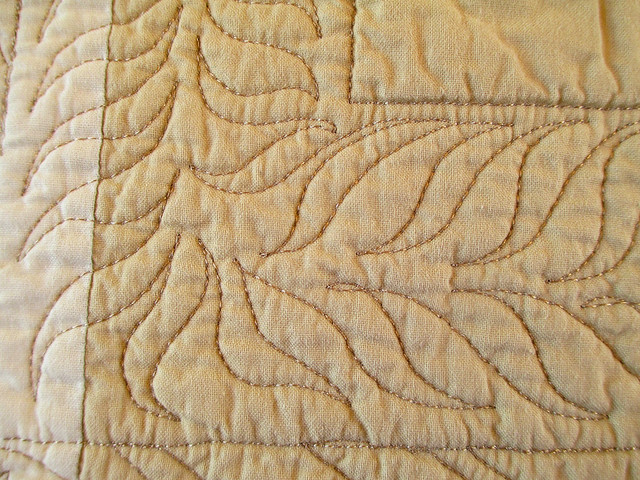
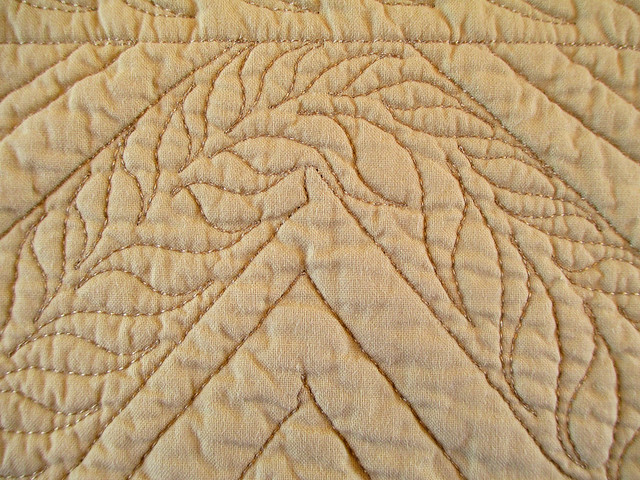
One small problem solved. Now on to planning the quilting designs. I will share my ideas about that subject a little later.

Posted in Uncategorized | 5 Comments

“Storm at Seaweed” Completed

I changed the name of the quilt top in this post from May 2013. I decided to use a familiar quilting design sometimes called “Fern” quilting. On my Storm at Sea I decided to call this “Seaweed” quilting and thus the change in the quilt’s name to “Storm at Seaweed.” Here she is:

You can see the quilting more clearly here:

The “Seaweed” fills the border, too:

Close-up of the mitered faux piped binding going around the corner:

The label:

A view of the backing including the hanging sleeve and label:

Last view:

Posted in Storm at Seaweed | 4 Comments

Pineapples Your Way Class

I was lucky enough to teach a little workshop at Delphines Quilt Shop in Gaylord, Michigan, last week. Five people showed up and I was surprised to see three of them were from a quilt guild I belonged to when I first moved to this area. What a joy to “teach” old and new friend this technique. I showed them how to make pineapple blocks any width rounds, any size without paper piecing and without a special tool. I managed to capture four images of the finished blocks. Sorry, Jessica, I don’t know how I missed yours!
Carol’s:

Pam’s:

Amy’s:

Lucy’s:

Oh, and here are a couple more pineapple blocks from teaching the same class in September. Sorry I do not have the names of the students. I need to remember to write all this down !

Posted in Pineapples Your Way | 1 Comment

“My Sedona Star”

I did it, I finally did it. The “Sedona Star” from the TQS 2012 BOM is finally completed. It has been on my longarm quilting machine since May!
A View of the Whole Quilt:

The central star has nine points suggesting things to come. You can see the nine log cabin rays surrounding the central star in this picture, too:

The next round was nine appliqued rays with a dot at their outer most point:

The next round was composed of three each of the following three Mariner’s Compass stars(That makes nine in all.):

Then came a round composed of three each of three different folk art heart and feather appliques sections (Yes, that makes nine of these, too!):

Then came nine “embossed” sections. I used my own arrangement of the preceding applique shapes to outline quilt and then background fill to achieve the embossed effect:

Next came a ring of triangles quilted in the “continuous curve” technique”:

Then, more folk art applique to fill out the corners. I used “pebbles” and tiny feathers for the background fill here:

I used more “continuous curve” quilting in the final border:

I completed the top by using a two-colored “faux piped binding”:

Mitered binding corner:

Now, for views of the backing:

Isn’t she pretty?

Credits:
Hobbs 80/20 batting, Metro thread for the quilting, Superior Rainbows thread for the applique blanket stitch, fabrics by Red Rooster’s “Buttons and Blooms”, The Quilt Show’s 2012 Block of the Month design by Sarah Vedeler. Thank you all for your support in this project!

Posted in Sedona Star | 17 Comments

The Berenstain Bear Quilt

Did I ever tell you about the quilt I made for my then 2 year old granddaughter last Christmas? I think maybe I forgot to do so.

The quilt was made using a charm pack. I alternated the charm squares with some pink print from the collection. I used the same print for the border. I sewed giant turquoise rick rack along the seam lines. I used another fabric from the collection for the backing:

The fabrics made charming little pictures all over the quilt top. Brother and Sister Bear:

… Papa Bear:

As you may recall, Mama always wore a dress made of turquoise polka dot fabric, so that is what I used for the binding. The binding is the normal narrow width on the front…

… but it is wider on the back. I thought that would be more like a “blankie” for my little granddaughter.

I had some of the backing fabric left, so I quilted it and made a little travel duffel bag to store the quilt and to use for necessities when visiting Grandma! Note the turquoise polka dot zipper pull:

All this was a lot of fun to make!

Posted in Berenstain Bear Quilt | 5 Comments

Double Wedding Ring

Four years ago on July 4 my daughter was married! Naturally, I had to make a wedding quilt as a gift and no other would do but a Double Wedding Ring quilt. As soon as the quilt came off the long arm and even before I applied the binding, I snapped this photo:

I designed a block in EQ7 and used a Moda fabric I knew she would love, Patisserie by Joanna Figueroa of Fig Tree Quilts.
It took me three months just to piece the project! From EQ7 I printed templates for the four-legged shape and the football shape. I drilled tiny holes in the templates so that I could add registration marks. I traced the templates onto the rosebud background fabric, transferred the registration marks to the fabric pieces and then cut out each of these pieces with a scissors instead of rotary cutter. The “patches” surrounding the football piece were paper pieced using a foundation pattern printed from EQ7, also.
The four-legged shape:

The football shape assembly sewn to the four-legged shape:

The entire quilt used 56 of these units. Just assembling the units was a challenge, but then sewing them into rows and sewing the rows together were quite a project, too:

I free-motioned a single feather in each football shape and continuous curve quilted the surrounding patches:

I free-motioned four curving feathers in the four-legged space:

I trimmed around and bound the curves of the rings on the outside edges:

I was really lucky to catch some good light for the finished quilting. The Front:

The Back:

11
For my daughter’s blog post about the quilt, click here.

Posted in Double Wedding Ring | 2 Comments

Storm at Sea Quilt Top Completed

Recently, I attended a lecture and trunk show at Delphine’s quilt shop in Gaylord, Michigan. The speaker was Jodi Barrows who invented the Square-in-a-Square ruler and who has written many books about using the ruler.

To use the ruler to make many of the basic quilt piecing shapes, you cut strips of fabric to sew onto a center shape, usually a square or a diamond, and then use the tool to trim. I used light blue batik fabric as the strip and dark navy batik for a diamond shaped center.

Here strips have been sewn to both sides of the center diamond shape.

These are then cut apart…

…pressed open…

… and trimmed using the ruler as a guide. In the case of a center diamond, first the 60 degree points are aligned with that area of the ruler and trimmed…

… then the 120 degree points.

After pressing, the patch is about as perfect as can be!

For the traditional Storm-at-Sea pattern, the diamond,…

…small square-in-a-square-in-a-square,…

… and the large square-in-a-square-in-a-square are required.

I chose a 3 by 4 block layout with one-half inch green inner border and 3 inch coordinating purple-blue outer border for my quilt top.

The finished measurements are 27 1/2 by 33 3/4 inch. Despite the resulting small size of some of the pieces, the ruler made it possible without too much trouble.

I intend to use these lovely Lava thread by Superior to quilt it.

I will post a picture of the quilting when complete.

Posted in Storm at Seaweed | 5 Comments

“String Explosion”

Follow my blog with Bloglovin

I was inspired by an article in the March 2013 “American Quilter” magazine by Gwen Marston to try another one of her “liberated” ideas. Click on these links to see two other projects I had already completed based on her ideas, “Stars and Stripes” and “Wonky Baskets.” This new article by Gwen is entitled “Gwen’s Liberated String Medallions” and is from her new book Liberated Medallion Quilts.

I had some scraps of Cherrywood hand dyed fabrics left over from my “Autumn Drunkard’s Path” quilt I completed just recently. They seemed like they would be just perfect for the strings needed in this design.

The finished quilt displayed on my work table:

Gwen’s version in the magazine was a little “wonkier” than mine. I used an even number of blocks on the outside ring which I feel gives my version a little more “explosive” look, thus the name for my quilt.

Close-up of the center. I quilted “ferns” in all the neutral “paths” throughout the quilt. I did stitch-in-the-ditch and some straight-line stitching for the remainder of the quilting:

Close-up of a corner. I applied a faux piped binding by machine:

A view of the back. I had an “orphan” block and several sizable pieces of the three neutral fabrics I used in the blocks as leftovers. I pieced these together to use as the backing:


Because some of the hand dyes started to bleed on the quilt top, I felt I had to wash the quilt after it was quilted and before it was bound resulting in a crinkly, antique look:

Close-ups of some “fern” quilting as seen on the back of the quilt:

The quilt hung on my fireplace:

I used Hobbs 80/20 batting and Metro Embroidery Thread, color 1914-5 Wheat.

Posted in String Explosion | 5 Comments

The Making of a Raffle Quilt

Our local quilt group was asked to make a raffle quilt to benefit the township’s historical society’s projects. Several of our group had already learned about a nice block called the “Disappearing Four Patch.”
I combined this block set on point and another pattern by Lori Smith called “Autumn Trails“. This is the quilt we made:

Each member of our group made about six blocks to get the 61 blocks we needed. Here are some of the “Disappearing Four Patch” blocks:

The quilt top center after the blocks were set on-point:

We decided to use a single fabric for the setting triangles and the border applique background. We decided to use fusible web and a small zig-zag edge stitch to applique the border trees and animals and cabins, etc. Here some of the border pieces after the zig-zag stitching was completed:

Just two of us were able to complete the applique stitching in less than a week in our spare time 🙂 .
A close-up of a few of the appliques:

The top completed:

I began the machine quilting by echo quilting around the border appliques:

Then I stitched in the ditch between the blocks and the setting triangles and quilted curling feathers in all the blocks:


…. and the back:

One more look at the completed quilt:

I used Hobbs 80/20 batting and Superior’s So Fine! #50 #434 MISTY BLUE thread for the long arm machine quilting.

Posted in Historical Society Raffle Quilt, Quilting | 5 Comments

Autumn Drunkard’s Path

I just completed another curved piecing project, “Autumn Drunkard’s Path”:

I was prompted to attempt this project for three reasons: 1) I bought a two-for-the-price-of-one Cyber Monday special from Cherrywood Fabrics consisting of two “grab bags” of approximately 10″ square hand dyes …

2) I acquired the Accuquilt GO! Drunkard’s Path die set and …

3) I had just successfully completed another curved piecing project. So I was ready to tackle this challenge. Mind you, Drunkard’s Path blocks are not too challenging when the blocks are fairly large, but these babies finished at 3 1/2 inches! Cute, aren’t they?

A stack of “parts” cut out:

Hard to believe these could be sewn together without pinning:

Here’s how you begin being sure to use a quarter inch foot with a blade guide on its edge:

Using a very short stitch length (1.8), take two or three stitches, then lift the presser foot and align the right edges along the blade of the foot. The secret I found was to take only a few stitches between repeatedly lifting the pressure foot and aligning the bottom and top edges. You end up with something that looks like this:

Finger press it…

…to look like this. It helps to have a very good set of bent point tweezers to grasp the edges for aligning:

You should watch Ebony Love’s tutorial here to get an excellent demonstration of how to proceed.

Here are a few of the 144 blocks in my final quilt top:

From the two grab bags of Cherrywood hand dyes, I chose the warm colors and all the greens. The final quilt top:

I long arm quilted the top using hand guided swirls in the circles and alternating horizontal and vertical loops in the squared off corners of the blocks:

A view of the back (a Kaffe Fassett Print from my stash) after quilting:

The binding was applied by machine using another hand dye I had in my stash:

I used the same hand dye to border the label:

A final view of the quilt hanging from the railing of my loft:

The final quilt was 42 inches by 42 inches. The batting was Hobbs 80/20. The quilting thread was Glide in color “Leather.” The bobbin thread for the machine applied binding was Superior’s Rainbows in color “Brass Band.”

Posted in Autumn Drunkard's Path, Quilting | 19 Comments